
Quick Start
A beginner-friendly guide, from your first login to adding your first client and your first appointment, with no prior knowledge required.
What is Esteforce?
Esteforce is a CRM for clinics and beauty centers that brings appointment, client, and messaging management into a single panel. CRM stands for “customer relationship management.” Put simply: it is a notebook that keeps your clients’ and prospects’ details, your conversations with them, their appointments, and where they are in the sales process, all in one place.
It does what a paper notebook or an Excel sheet does, plus the following:
- It plans appointments while checking specialist and room conflicts, and shows them in a calendar and a list.
- It collects messages from WhatsApp, Instagram, Messenger, TikTok, Telegram, X (Twitter), email, and the chat box on your website on a single screen.
- It lets you see, as a team, who is handling which client and what stage each quote is at.
- It reminds you of forgotten work (tasks, call reminders).
- It keeps your sales, collections, and expenses in Accounts.
- It reports how many appointments and sales you have made and which ads are working.
If you come across a word you don’t know in this guide, check the Glossary page. In Esteforce the interface says Client instead of Customer and Clinic instead of Branch; this guide uses the same terms.
What do you need before you start?
- Your login address. This is an address specific to your company, for example
https://companyname.esteforce.online. Esteforce sends you this address by email. - Your email address and password. If you forgot your password, your admin will set a new one. See Forgot Password.
- An up-to-date browser. The latest version of Chrome, Edge, Firefox, or Safari is enough. You don’t need to install any separate program.
Step 1: Log in
- Type your company’s address into your browser’s address bar.
- Enter your email and password and press the Log in button.
- If two-step verification is turned on for your account, a code will be sent to you. Enter the code in the box. (This is an extra security step that makes it harder for others to open your account.)
- If a user agreement appears on your first login, read and accept it.
Add the address to your browser’s bookmarks so you don’t have to type it every time.
Step 2: Get to know the screen
When you log in, the Overview page opens. It shows channel performance, new clients, upcoming appointments, and appointment statistics. See Overview for details.
The screen has two main parts:
- Left menu: You reach all sections from here (Clients, Clinic Management, Appointment Management, Accounts, Tasks, Reports, Settings, and so on).
- Center area: The content of the section you selected appears here.
Some sections in the left menu contain a submenu. It opens when you click on it.
If you don’t see a menu on your screen that you see on a colleague’s screen, this is not an error. Menus vary according to your permissions and your company’s plan. See the Roles and Permissions page for details.
Step 3: Add your first client
- Open the Contacts section from the left menu and click Clients.
- Press the New Client button at the top right.
- Fill in the First name, Last name, and Mobile (cell phone) fields. Use the flag on the left of the phone box to select the country (default Türkiye +90) and type the number, for example
532 123 45 67. The system adds the spaces itself. Details: Entering Phone Numbers. - If you like, also select email, language, and client group.
- Press the Save button.
The record appears at the top of the client list. You can click it to open the client’s card. For adding clients and the Add Meeting card, see Clients.
If you try to create a second record with the same phone number, the system warns you. This way the same person isn’t saved twice.
Step 4: Create your first appointment
- From the left menu, click Appointment Management → Create Appointment.
- Select the client, the treatment, the specialist, and the room.
- Pick the date and mark a suitable time on the time grid.
- Save. The appointment appears in the Appointment Calendar and the Appointment List.
For the rules (conflicts, the meeting requirement, package sessions), see Appointments. If you can’t see any available time, check the Availability Calendar.
Step 5: Leave a note or task
If there is something you need to do after talking to a client, create a task in the Tasks section so you don’t forget. For example: “Call Ms. Ayşe tomorrow, discuss the treatment package.” See the Tasks page for details.
How do the CRM and the chat system work together?
Esteforce consists of two parts, designed to work together:
| Part | What it does | Where? |
|---|---|---|
| CRM | Clients, appointments, deals, quotes, sales, tasks, reports | The panel you are using now |
| Chat system (Chatmatic) | WhatsApp, Instagram, Messenger, email, and web chat conversations (inbox) | Chat Channels in the left menu |
A simple analogy: the chat system is your “phone and mailbox,” and the CRM is your “client notebook.” The client writes to you through a chat channel; you keep their record, appointment, quote, and follow-up in the CRM. They constantly feed each other.
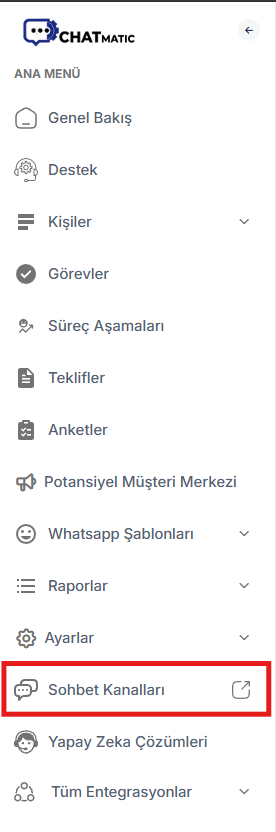 Chat Channels link in the left menu
Opening the chat system
Click Chat Channels in the left menu. The inbox opens in a new tab; your CRM tab stays where it is. You work by switching between the two tabs.
If the menu says “No connected account,” no channel has been connected yet. First connect a channel from the All Integrations page.
Where do the two systems meet?
- From the client card to the conversation: The Open in WhatsApp button on the client card opens your conversation with that person directly in the inbox. You don’t need to search for past messages. The appointment detail window has the same shortcuts (call, WhatsApp, Instagram, Messenger, send template).
- From the conversation to a task: When creating Tasks, you can link a chat or a deal to the task. A task like “Prepare this reply for this client” stays together with the related conversation.
- People coming from ads: People coming from your ad, web form, or Web Chat are first collected in the Lead Hub. When you convert them to a client, a CRM record is created and their process begins.
- From chat to appointment: You move a deal that started in chat forward in Pipeline Stages and turn it into an appointment and Quotes.
- Templates and surveys: WhatsApp Templates and Surveys are prepared in the CRM and reach the client through chat channels.
- Reports: Ad Analytics tracks the path of “how many chats came in, how many became contacts, how many became clients.” Chat Reports measure your response times.
- Permissions: Who can see and reply on which channel is set in Integration permissions. See Roles and Permissions.
A sample day
In the morning, Ms. Ayşe asks about prices on WhatsApp after seeing an ad.
- The message lands in the Chat Channels inbox, and someone on the team replies.
- Ms. Ayşe shows interest. You save her in the CRM as a client (or convert her if she is a lead) and note the treatment she is interested in with Add Meeting.
- With Create Appointment you pick a suitable specialist, room, and time; if you wish, you send a reminder template on WhatsApp.
- If Ms. Ayşe doesn’t show up, you mark the appointment No-show or set a call reminder.
- When she arrives, you set the status to Arrived / Completed and record the payment with Add Sale. If you wish, a satisfaction survey is sent to her automatically.
- At the end of the month, you see in Ad Analytics which ad this client came from, and the revenue in the Appointment and Sales Reports.
Recommended way of working: Keep the chat tab open throughout the day and reply to messages; do appointments, meeting records, quotes, and tasks in the CRM tab.
Next steps
We recommend following this order:
- Define your treatments, sub-treatments, and packages: Treatment Management
- Add your rooms and devices: Clinic Management
- Add your teammates and assign treatments to specialists: Team Management and Staff and Clinics
- Define the stages of your process: Pipeline Settings
- Connect your messaging channels: All Integrations
If you get stuck
- First check the Frequently Asked Questions page.
- If you can’t solve it, open a request from the Support section in the left menu: Support Requests.